LIMITED TIME OFFER: FREE SHIPPING! ORDER NOW
Terms and conditions apply. See details here.
There are many mounting options for solar collectors, this may include ground mount, roof mount and wall mount. Some important factors in deciding how to mount the solar collectors are:
ease of access to the collectors and ease of the installation of the collectors
Ground mount is ideal for any solar install as it allows you to minimize your vertical run which can save on installation costs. The other advantage is in ease of service and assembly. When ground mounting, you can also select a more optimal azimuth (direction to south). In winter you can easily remove snow without climbing on the roof.
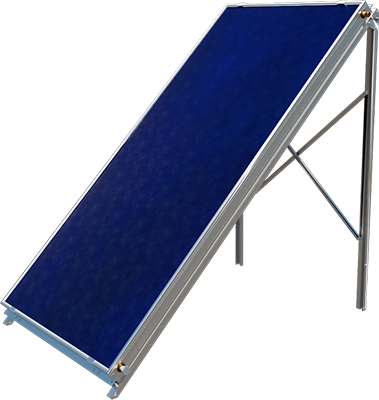
The frame system for the ground mount consists of a series of aluminum channels that support the collectors at a 45-degree angle. With a ground mount, you need to ensure that the feet on the bottom of the frame are securely fastened to an anchoring system. This can utilize, for example, heavy building blocks that form the base with concrete lag bolts to fasten the legs to the blocks.
Ground mounted collectors should be protected from children and vandalism; a small fencing system may be installed to protect your collectors especially if you have a larger quantity. A ground mount can also be used for flat roofs. As with ground mounts securing the collectors is important when mounting to a flat roof. Contact a roofing company if you are planning to secure the collectors to a flat roof.
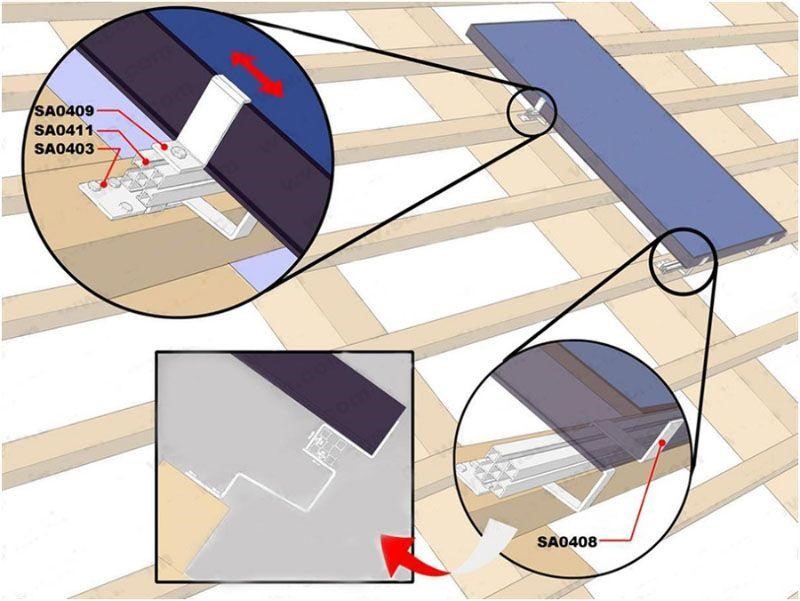
Roof mount is a great way to clear low lying obstacles such as neighbor’s houses and trees. Roof mount usually has the highest chance for unobstructed views. Special care must be taken when installing roof mounts to avoid leaks and ensure there is a solid connection to the roof rafter/truss system. Roof mount is a great way to protect the collectors from accidental damage such as kids playing baseball, etc…
Before you take the time and energy to mount the solar collectors on the roof, be sure to consider the roof’s current condition. If the shingles are curling and show signs of aging, then you may want to put new shingles on before you install your collectors. Also ensure the plywood below the wood feels solid. Look under the attic and inspect for any possible deterioration on the roof sheeting that may need to be replaced 1st. Remember the solar collectors have a life of 20-30 years so you need to ensure this matches the life of the roof itself as removing the collectors after the fact can be difficult and time consuming.
The roof mount kit comes with 4 fastener points that are adjustable so that you can always ensure you fasten to a truss beam. NOTE: Never fasten just to the plywood and shingles.
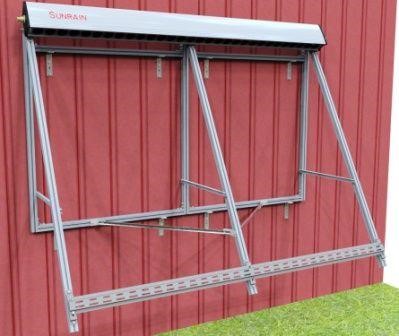
Wall mount is ideal if you are trying to do winter solar space heating. The vertical angle provides great performance in the winter, and you obtain the added benefit of diffused light reflecting from snow. The steep angle also minimizes any snow load problems.
By creating a steep angle for the winter sun, you will naturally create a poor angle for the summer. This is a great strategy to reduce unwanted heat in the summer.
As with roof mount, you need to ensure the solar collector it is properly secured. This best appearance is if the frame is attached directly to the wall. However some situations may arise where horizontal 2x4 boards are first attached to the wall and ensuring these screws penetrate into the studs, not just the sheathing. Normally studs are 24 or 16 inches on center so, once you find one stud, it is easy to determine where the others are.